Monday, January 6, 2014

Woodworking Level Two

As mentioned in the last post, I really enjoyed the first woodworking course I took last fall. So much so, in fact, that I immediately signed up for the next one, despite the facts that my 3P allowance was more than used up on the first course and the second course started just over a week after the first one ended. (And didn't finish until less than a week before Christmas!)

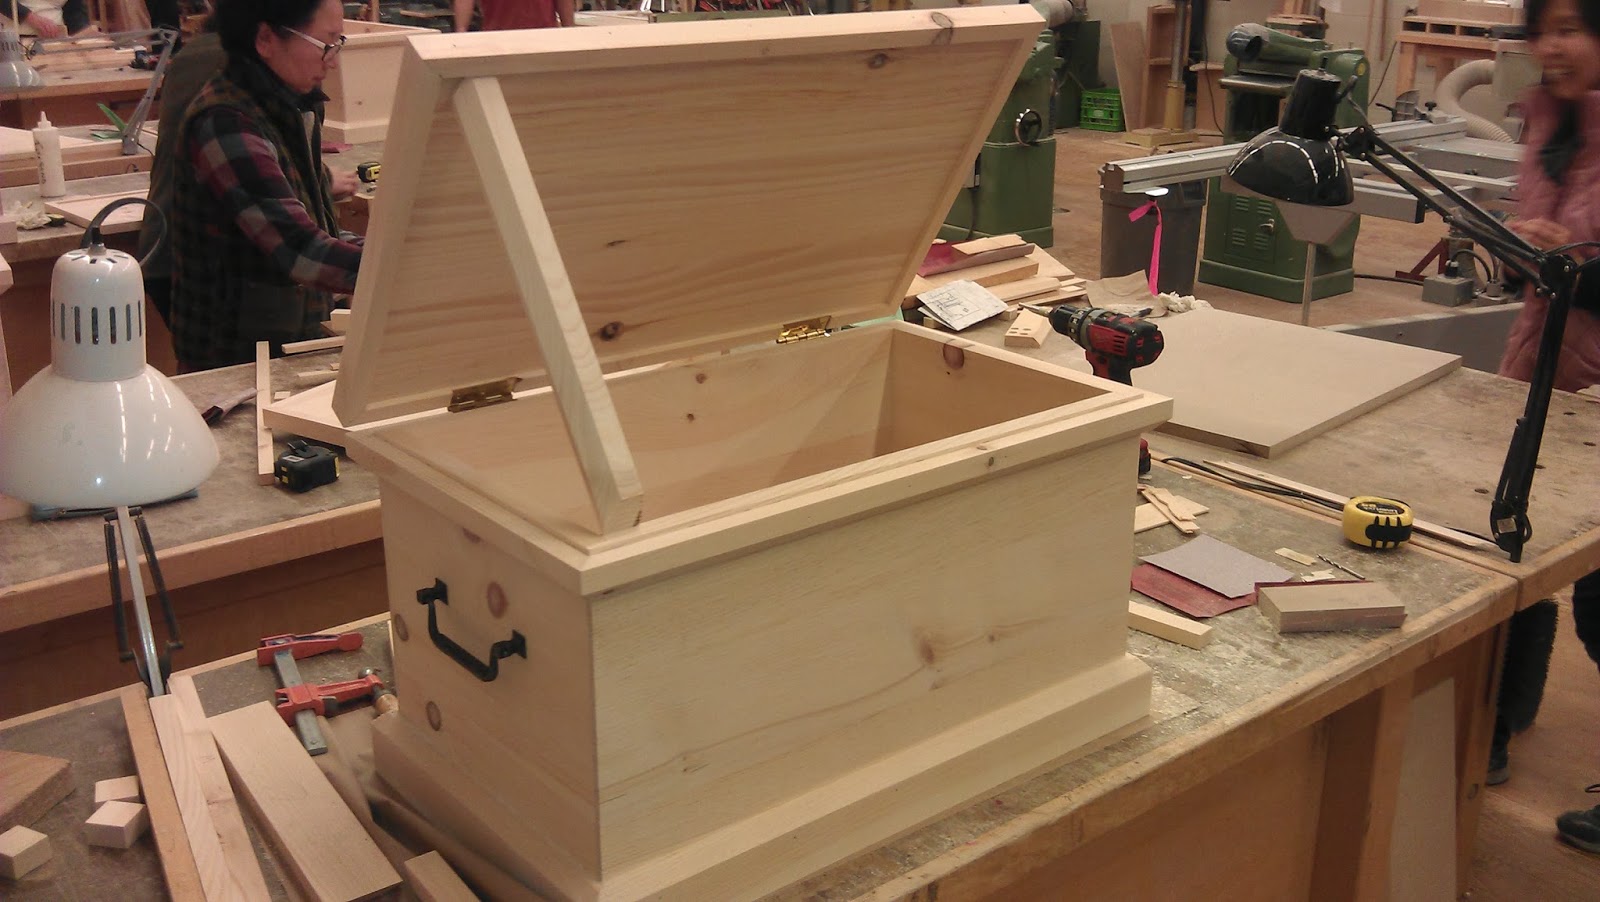
The second course, creatively titled Woodworking Level Two, promised to not only have us learn new and more technical procedures, but also to supply us with something that was NOT a blanket box. So.. different?

Let me also take this opportunity to apologize for the poor image quality of the images in this post. I couldn't exactly haul my nice camera into the shop every week, so I had to take all of these with my camera phone. To make up for the crappy images, I've made sure to include a lot of them. So yay, I guess.

Anyway, much like the first course, I had to go out and purchase the raw lumber. One major difference, though: for this project we'd be using fir instead of pine:


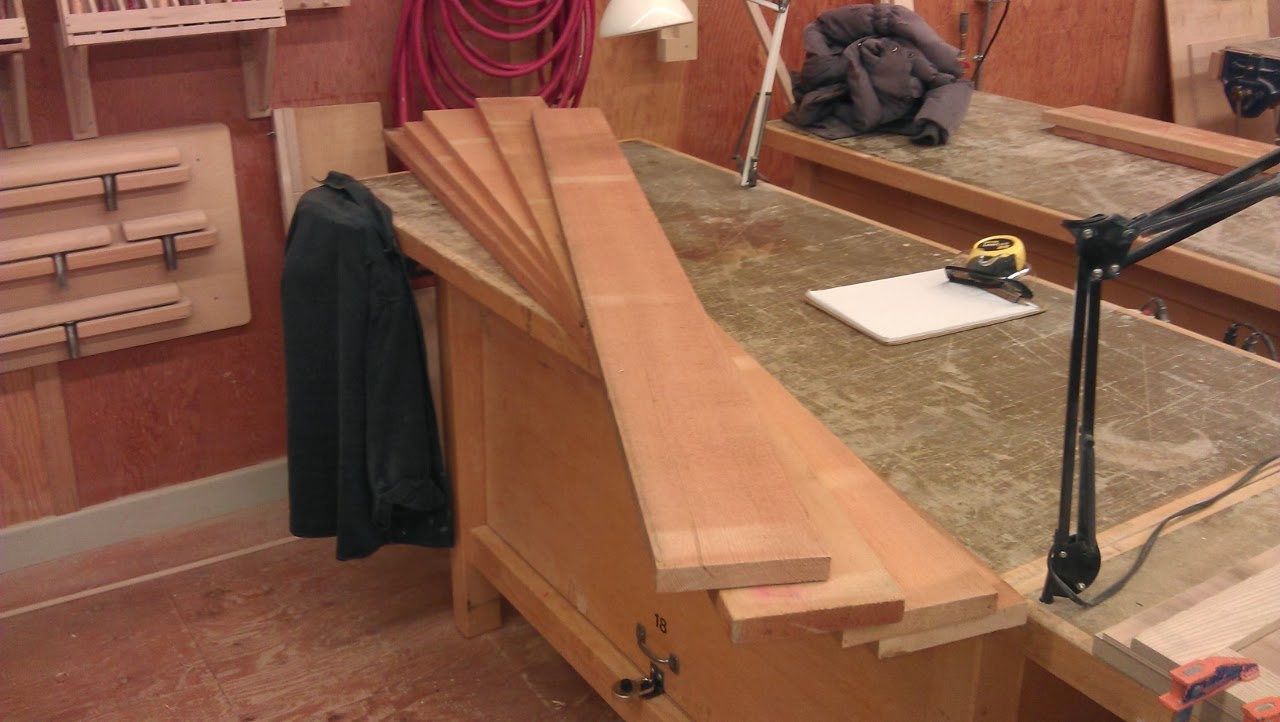
Make that TWO major differences if you count the price. Let's just say I'm much more reluctant to make kindling out of the leftover scrap.

The project for this course was to build an arts-and-crafts style wall cabinet. Out of the nine people taking the course, eight of us had just finished the Woodworking Level One course together and it was the same instructor, so it was really easy to just dive right back in.

It also seemed to progress much faster (fewer people waiting in line for the table saw, maybe?), and by the end of the first class, I had the sides, top, bottom, and middle shelf all planed, jointed, and cut to size:


The next step was to cut the dadoes and add the details on the uprights, and chamfer the appropriate edges on all of the front-facing sides. This is one of the details that defines the arts-and-crafts style, apparently (but what do I know? I'm still learning....):


Then we drilled the holes for the shelf supports and assembled the main carcass:


It was about here that I started to wonder why we needed all 9 classes for this course. After all, it had taken us the better part of four courses to just dry-fit the carcass in the last class and I had already finished the glue-up on the cabinet by the start of the third night!

At which point, of course, we started the hard parts.

First up was making the stiles (long uprights) and rails (shorter crosspieces) for the doors:


Cutting down the rails to form the stub tenons:


And fitting the pieces together into doors (note the extra rails for practice and mistakes):


Then cut the panels (out of plywood with a fir veneer - they're not solid wood as that would have been rather expensive and time-consuming - and a more advanced technique than we wanted to get into for this class) and glue up the doors:


Then we got to learn how to resaw lumber to make thinner boards without wasting too much material in the planer (I'll need to practice this technique - I got it done okay, but my pieces turned out slightly wonky), and made simple drawers:


It's a good thing I made extra material, because I broke two sides while trying to glue up my drawers, and had to remake them. Pro tip - the bottom of the drawer doesn't have to be quite THAT snug...

Fortunately, I recovered from the mistake, and managed to get the drawers assembled, and then sanded them down to fit into the appropriate receptacles:


Somehow, after all that, I had exactly one class left to do the hinges, just like last time. Amazing how time flies when you're having fun, eh?  I started by carefully and gradually shaving down and "bluffing" the doors until they fit into the opening with the same reveal all the way around:


Then I marked out the hinge placement and mortised the sides of the doors:


And then mounted the hinges to the sides of the cabinet. Fortunately, I had bought high-quality hinges, and thus didn't have to mortise the cabinet sides as well - I could even adjust the spancing afterwards:


And that was it! Last class of the course and I had a completed cabinet:


Well, almost. I still had to actually finish it. So I took it home and disassembled it to prepare it for staining:


I'll spare you the boring ass details of the sanding, staining, and applying shellac and instead just show you how it looks on the wall of our kitchen:


So there you have it!  A...


What?


What's that?


You want to know what we plan to keep inside it?


Well....


All right. But keep in mind that it's not very deep.


And not that big, either, once the shelves are in.


But we did find SOMETHING that fit.


Just right.


Next course start March 3, by the way. I'm already signed up.


Thursday, January 2, 2014

Woodworking Level One

So my company has this thing called the 3P Program (it stands for Personal Progression Program, which should make it the 2P Program, but whatevs, right?) where employees can choose some sort of personal improvement or goal, and the company will give them some money towards achieving that goal. Weight loss and quitting smoking are popular choices, but we've had people use the money to improve their home brewing set-up, learn karate, take guitar lessons, and even adopt a kid. Really. No, not all at once - different people, dummy.

Anyway, last time I applied for the 3P grant, I used it to get our bikes fixed up so we could spend more time biking around the peninsula (mostly heading to or from the pub, of course). I'm already paying my own way at the gym and I haven't smoked in years now, so I was somewhat at a loss for what to apply for this year. I've been toying with the idea of taking some continuing education courses for a while, but I wasn't really sure what I wanted to take.

And then I noticed that they had some interesting courses for woodworking. The War Department had actually taken a couple of woodworking courses a few years back (the results of which are still scattered about the house in various stages of completion) and really enjoyed it, and it sounded like something I would not only enjoy, but probably find useful in our ongoing renovation efforts as well. You know, to help reduce the chances of something really serious showing up in the Injury Report.

So I signed up for Woodworking Level One, which started at the beginning of October. The first thing I had to do was go buy the lumber:


(Well, technically, the first thing I had to do was figure out the difference between lineal feet and board feet, but whatevs.)

(I'll stop saying whatevs now. Even I hate myself when I say it.)

Two three-hour classes in and I had managed to make not only a whole lot of sawdust, but the three panels that would form the front, back, and sides:


The pieces on the left there would eventually become the lid, but I didn't get to that because there was a bit of a line-up at the planer. (Heh, out of the twelve people in the course, eight of them worked in IT. Go figure.)

Some more planing and sanding got me a bottom panel as well, and then I cut the dadoes and rabbits to fit the whole carcass together:


That's not actually assembled - it's just a dry fit to make sure the pieces went together properly. To actually assemble it, I used a judicious application of glue - and lots of clamps!


There followed a bunch of classes that involved cutting and fitting the trim (and the only semi-serious mistake that I made throughout the construction and won't describe here), and then assembling the lid:


It took almost the entire last class just to fit the hinges as they required lots of router work and delicate mortises. I used a piece of scrap wood here to prop the lid open to show the hinges and construction - it's not part of the actual box:


Of course, as I was moving the box off the workbench to make room to mortise the hinges out, I gave the bottom of it a great big jeezley whack on the bench vise, leaving a big dent right in the bottom trim near the front left corner. Sigh.

I'm not a huge fan of the shiny brass hinges (they were the only ones I could find at Home Despot on short notice), but I really like the handles. The instructor was also impressed - I was the only one in the class to finish both the hinges and the handles - and said that IF he actually gave out grades, I'd get an A+. (Curse you for not providing letter-based validation, adult continuing education!)

Anyway, it took a fair bit more sanding and filling and whatnot, but I rubbed it down with several coats of tung oil and then waxed and buffed it to a dull shine:


So now I have to figure out what to actually DO with the final product. Maybe I'll make some smaller boxes to store in the bigger box. Or maybe I'll give it away to a deserving orphan or something. Maybe I'll keep one of the cats in it until they SHUT UP AND LET ME SLEEP IN FOR ONCE.

As far as the course itself went, I have to say that I was really impressed. I learned a lot more than I honestly thought I would, and picked up many hints and tricks that will help in the future - and not just with woodworking but with other renovation projects as well. So even though a three-hour course in the evening made for some very long days, I was still really looking forward to the next one... which started less than two weeks later.