Showing posts with label The Injury Report. Show all posts

Monday, December 4, 2017

Door surgery

We've been spending most of our shop time lately making some improvements to the layout and overall organization of the garage. Meaning we've come a long way, but I'm still moving that one pile of boards from the corner to the bench, back to the corner, to a different corner, to a different bench, to the other corner and so on and so on. (All the while hoping the War Department doesn't ask me why I insist on storing that huge stack of off cuts under the table saw.)

Anyway, that's what I was up to on the weekend when I came across a new door sweep that I'd been intending to put on the front door. The old sweep was getting pretty trashed, and I figured that what with winter coming on, a couple of minutes to make the swap would be time well spent.

HAHAHA! Nothing ever takes me only a couple of minutes!

Though in this case, it wasn't ALL my fault. See, this was THIS front door:


That's right - the door that looked like it had been cut by a spastic grizzly bear taking a running start with the world's worst circular saw. I'd forgotten just how bad it was, but once I removed the tattered old sweep, we were faced with a brutal reminder:


I could fit my hand right through the crack. I tried to just put the new sweep on, but even with it pushed down as far as it would go, there was still daylight visible between the threshold and the bottom of the sweep.

Did I mention that Sunday was the first really cold day we'd had this winter? There was no way I could leave it. So I convinced Amy to let me try to fix it, and - amazingly - she agreed.

I popped the hinges, and took the door around into the workshop. The first step was to clean up that awful cut, and try to make the bottom of the door solid again. Out came the circular saw and a whole whack of clamps, and hey presto:


Once it was all cleaned up, I found a nice sturdy piece of fir in my wood shed (did I post about my wood shed yet? Lemme check real quick.... damn it. Okay, stay tuned for that.) and carefully trimmed it to size on my table saw. Well, carefully enough, even though I did cut the damn thing about a quarter of an inch too thin. Sigh. It still worked okay, but man, that was dumb. Probably still feeling the effects of falling off the ladder on Saturday. Oh, yeah - about that.

The Injury Report

I was putting up the stupid Christmas lights on the stupid little flyout roof over the stupid living room windows and the stupid orchard ladder wasn't quite tall enough and the stupid extension ladder is too stupid and awkward and stupid and I hate putting up the stupid Christmans lights anyway and just wanted to get the whole stupid chore over with so I stupidly tried to pull myself up and the stupid ladder tipped over and sort of I fell off  even though I kinda of fell more down the stupid ladder than off really, but it was still stupid and now I'm no better than my stupid neighbour who falls off stupid ladders and I have a couple of stupid scrapes on my legs from the stupid ladder and a great big stupid bruise on my stupid fucking ego. So there.

Where was I?

Oh, right, so I cut off the bottom inch and half or so of the door, and then attached a new piece of solid fir right across the bottom (glued and screwed, baby):


I put the door back on its hinges, attached the sweep, and now there's no daylight and, more importantly, no freezing-cold air coming underneath the front door.


Sure, it's not painted and it ain't pretty, but we're thinking of ripping out the whole damn door and putting in a new one in the spring anyway. This is just to make sure we don't blow the entire new door budget trying to heat the front hallway over the next few months.


Sunday, October 22, 2017

Bushwhacking

Hello? Is this thing on? Hello?

Oh, hey there! How are ya? Been a while, eh? Yeah, I know, I know. This time, though, I swear, I really will start....

Well, we're here now, anyway, so let's get to it!

We've been telling each other for, oh, let's say five years now, that we REALLY need to do something about the blackberry canes in the backyard. But due to one reason or another (worried about disturbing the bunnies, laziness, too many wasps, or a combination of all three), we've been putting it off and putting it off.

Until our backyard starting looking, well, jungley, and it was starting to get ridiculous. So we geared up, invited the Not-Those-Clarks-The-Other-Clarkes over to join in the "fun", and waded right in.

Choose your weapon!


It was somewhat difficult to really get a decent shot that showed the true extent of the infestation, so here are some more-or-less "before and after" pairs showing roughly the same spots in the yard.

Before


After

Before

After


And my personal favorite...
Before

After

All in all, we cleared a metric shit-ton of blackberries, and really changed the entire look of the yard. This particular chore was long, long overdue. Of course, such a successful day did not come without cost...

The Injury Report

As it turned out, the machetes weren't the most effective tools in our aresenal. The best way to clear out the canes was to chop them off a foot or so above ground, and then get a firm grip on a few of them and just haul on them.

Well, I was deep in the jungle, doing exactly that. Unfortunately, somewhere in the mess of branches and blackberries that I was hauling on was a cane under tension. When the bunch I was hauling came free, the rogue blackberry came up and whapped me right in the eye. It felt just like that time I was pulling nails out of the flooring in the basement at the old house, and one of the nails came up and thumped me.

After the requisite swearing and squinting, the pain receded a fair bit, and I went back to work, thinking that I'd had a lucky escape - it would have been really nasty if a thorn had stabbed me, wouldn't it?!

We finished tidying up the piles of blackberry canes, figuring that we'd deal with actually getting them out of the back yard the following weekend and maybe even rent a chipper to make the job easier (which didn't happen, but it turned out that just cutting them up and taking them to the yard was easy enough). The Not-Those-Clarks-The-Other-Clarkes went off home to get cleaned up while I mowed the lawn, and then we all met back up for some well-deserved dinner....

Except my eye had REALLY started to hurt again. It was tearing up like mad, and I was getting sharp pains when I tried to focus or went into a brightly-lit room. Thinking that maybe the injury was worse than I had originally thought - or that I'd gotten something stuck in it, we sent our guests home (unfed, I'm sorry to say), and hied ourselves off to the clinic (which was closed, of course) and then to the emergency room.


(Nothing in that cupboard was for me, but I spent a good 30 minutes reading those signs and wondering what some of those things were for ...)

Turns out that the branch DID have a nice big thorn in it, and I'd done a tremendous job of puncturing my cornea. Yay me! It took a little over a week's worth of near-constant eye drops (four different kinds) and three trips to the eye doctor before it cleared up.

Pro tip: Even if they do make you look like a safety nerd, always wear your safety gogglers.


Wednesday, December 5, 2012

The arbor

So we bought this arbor from Lee Valley. Like, ages ago. And when I say ages ago, I mean AGES ago. Pretty sure the box was already sitting in our garage back when we tried fixing the stove. So, yeah, it's been around a long time. But hey - it's a nice arbor, we got it for a good price, and if it happens to sit around in the garage (or outside under the eaves, for that matter) for a ... year or two, well, we'll get around to it eventually, right?

After all, there's a brand new toilet in our storage space that we've had for almost THREE years, still in its box and everything. I shouldn't mention that, though, or the War Department will make me install it somewhere. Knowing that it's waiting in reserve is probably the only thing keeping the toilet from hell working at all.

Where was I? Right. The arbor.

Anyway, the reason we bought this arbor is because the old one that Frank left behind was completely rusted through in several places and only being held up by the wysteria growing up the side of it. There were actually two of the damn things, but one of them got ripped out during our aborted attempt at putting up the resin shed. Which, come to think of it, means that both of these arbors were involved in us buying something and then storing it in the garage for an extended period before actually erecting it. You know, I'm just not going to dwell on that right now. Or, probably, ever. This post is already depressing me and I haven't even started telling you about what a pain in the ass it was to actually install. Because you know that's coming next, right?

Cause if you don't, well, it's probably my fault for not updating the blog enough.

What the hell was this supposed to be about again? Jebus, but I'm bad at this.

Okay, so, the arbor. This thing:


Maybe, at some distant point in the Pleistocene or something, that might have been a good-looking arbor. Cast iron (mostly), nice detail, not too ornate.

Oh, who am I kidding? Crappy Tire special all the way.

Anyway, like I said, it was pretty thoroughly rotten - as this close-up will no doubt help illustrate: 


(That's a handy picture to include for other reasons, too, actually, as it shows precisely the main function of the arbor: to hold up the hummingbird feeder. The light on the side? Oh, that's to keep the feeder from freezing in the winter. Keep that in mind as you read this post: all of the effort described herein was solely for the benefit of the hummingbirds in the backyard. Hummingbirds. The biggest assholes in the avian kingdom.)

The good news about it being rotten is that taking it out was EASY. I just sort of yanked on it, and the half-inch of concrete it was sent into levered right up in one big chunk. Well, until it split neatly in half, of course, but that just made it easier to break up and fit into the wheelbarrow. Took longer to drive the scrap metal up to the recycling center than it did to take out the arbor, actually. Yep. Easy.

So... easy.

Sigh. Should have seen the rest of this project coming, I really should.

So, the new arbor was slightly different in design than the old one in that it was designed with legs about 18 inches too long for the arbor. This is because you're supposed to dig a hole for each post, and then set the posts in concrete. Of course, we kind of wanted a pad underneath (seeing as how the old one came up with the old arbor and it was a piece of shit anyway), so we figured we'd just dig out a big old hole at the base of the stairs there, set the legs into concrete, and then pour a nice slab across the top.

Problem One: bedrock. So, it seems like there's a reason for all the terraced levels and the steps in the backyard. It's because there's a bloody great rock underneath all the weeds. And this rock is right underneath the steps. And comes out from the steps underneath the lawn a little ways.

Which is a round-about and not very clear way of saying that there was no way to dig the hole deep enough without coming way out into the lawn. The front legs would have been fine, but the back legs would have been about four inches long, and propped on bedrock.

Well, I REALLY didn't want to start cutting the legs to different lengths, so we decided to just fill in the hole, pour a nice pad, and then cut the legs off the arbor and attach it to the pad.

Which we did. Well, the first bit, anyway. We filled in the hole, built a nice form from some spare scraps of two-by-four, got a few bags of concrete, mixed them up in the wheelbarrow, and poured a nice little pad at the base of the stairs. Then I measured up the legs all careful like, and cut them off with my trusty(-ish) hacksaw.

Then we realized that the concrete had to cure for at least 28 days before we started drilling into it with TapCons. Which meant propping the arbor up on the lawn for a month. (Couldn't put it back in the garage - how will we hang a hummingbird feeder from it in there?) So, that sucked. But, as it turned out, we needed those four weeks to figure out how the hell to attach four hollow metal legs to a flat concrete slab in a way that didn't leave the hardware exposed to the same weather that had already caused two metal arbors to rot.

I... can't even really describe the things we thought of using. L-brackets, fence hardware, hand-carved wooden blocks (I might have had a few beers when I thought that one up, I'm just saying) - hell, at once point I was convinced the best way to do it would be to start over. Or maybe just put it back in the box in the garage. It was happy there, I could tell. It didn't speak to me in that mocking whisper in the quiet moments just before the dawn...

Anyway, we wound up paying an extra $40 for a metal working shop up near Amy's work to make us some custom brackets out of scrap aluminum. Then, during a brief break in the incessant November rains, I got out there with a hammer drill and my LEAST FAVORITE FASTENERS IN THE WORLD, a box of TapCons, and I installed the brackets in the pad:


Which went about as well as could be expected for TapCons, and by that I mean I only broke one bit off in the hole, and only snapped the head off of one TapCon (which meant I had to drill a new hole in the bracket, which also meant I wound up installing the bracket at the wrong damn angle so the metal screw that attaches the bracket to the arbor is going into the metal on a different side than the other legs). I call that a roaring success.

Amazingly enough, the arbor went down over the brackets, and we now have a fully functioning hummingbird-feeder-hanging-device back up in the garden. 


The Injury Report 

 The project, of course, got its requisite amount of blood and swearing - I managed a nice little knuckle punch of the rock retaining wall when the drill bit snapped.


God damn it, I hate TapCons.


Sunday, May 13, 2012

Testing the limits of a good cliche

I'm not sure what people expect when they come to this blog, but I can't imagine anyone's expectations are very high. (Unless, of course, they reached this blog through a combination of search terms like "how do I best go about hurting myself while accomplishing simple, everyday tasks?" THOSE people are happier than clams. Why are clams so happy? Well, that's probably a question for a different part of the Internet. We just do renos and mayonnaise here.)

For our regular customers, good news: this week, I thought I'd aim for a new low! We're going to test that aged saw about how pictures are worth a thousand words. If it's true, this will be wordiest damn post you ever read...

To best present our wealth of visual imagery, I give you:

Every single conversation I will have at work tomorrow morning!

Let 'er rip!

Unsuspecting Coworker:
Hey Don! How was your weekend?

Half-asleep Don:
Uh, well... we, uh.... kinda. Well, this:

UnCow:
What the hell is that?! And what is it doing in your driveway?!

Don:
It's called a rock box, apparently. It can hold up to ten yards of soil or, as the name would suggest, rocks. Of course, like everything we do, it wasn't quite smooth sailing:

UnCow:
That would be an inconveniently positioned sprinkler head, yes, but what the hell did you need something that damn big for?

Don:
To fill up with rocks. From here:

UnCow:
Oh, right, your patio! Man, that looks like a lot of digging. I sure hope you had some help!

Don:
Yeah.

UnCow:
...

You're nuts.

Don:
Yeah.

UnCow:
I meant help, like, other people.

Don:
Oh, absolutely. We had another couple come over with their picks and shovels and crappy-ass wheelbarrow. Couldn't have done it without them, actually. But we bought extra beer and snacks, and filled them full of pork before we sent them home:

UnCow:
Oh, man... Amy's Famous Pulled Pork. I bet that was good, eh?

Don:
Oh, yeah.

UnCow:
So did you drive that Bobcat yourself, or did you hire somebody?

Don:

UnCow:
Uh... wow. I guess they let just about anybody drive those, eh?

Don:
Yeah.

UnCow:
So how much of that rock box thing did you fill, anyway?

Don:
Well, even with the Bobcat, it was pretty slow going, actually. When we stopped for a quick lunch, we had really only done half of the earth removal, and hadn't even started on the tricky bits:

Of course, the skip was filling up pretty quickly:

In the afternoon, though, I was starting to get the hang of the controls on the machine, and by the end of the day, we'd filled the skip almost to the brim:

But you could really see the shape of the patio coming in:

UnCow:
That looks like a pretty good weekend's work to me.

Don:
Yeah, but then on Sunday, the War Department noticed there was some room left in the skip, and figured we should round off the corner a little better to make room for the retaining wall we'll have to build. And then we went and got a yard of road base:

At that point, the skip was REALLY full, and the gravel place had closed for the afternoon, so we had to call it a day.

UnCow:
Huh. And here I thought you were just going to go to the Times Colonist Book Sale this weekend!

Don:
Oh, I did that, too.

UnCow:
You really are a nut job, you know that?

Don:
Sigh. Yeah. I know.

UnCow:
So, uh, I almost hate to ask, but...

Don:
Go ahead.

UnCow:
Really? Sweet! So, uh, Don? Any, uh, updates to everyone's favorite feature,

The Injury Report?

Don:
Yeah: apparently, I'm not so hot with ramps. I was wheeling a wheelbarrow up into the skip, and the ramp jumped up and bit me:

I pretty much stayed in the Bobcat after that. Well, I tried to.

UnCow:
I'll bet! So, uh, any of that pulled pork left?

Don:
No. Go away now.


I'm missing SO many details, but everyone wanted to see pictures (DAD), and I'm unbelievably tired. So I'll sign off here, but a HUGE, mega-big thanks to Not-Those-Clarks-The-Other-Clarkes, who worked their butts off on our patio for nothing more than a few beers and some pulled pork. Sure, the pork was pretty damn good, but still - we owe those guys, big time. Oh, and everyone involved wanted me to say a special thanks to my ol' buddy, Theo, who had the bright idea to rent the excavator in the first place. Saved us a lot of time and effort, seriously.

And oh. My. God. Was it ever FUN to drive! I WANT ONE!!!

Sunday, May 6, 2012

Yard Work Part Two: The Fence

It's Sunday night at the old Tudor hacienda, and I suppose that means it's time for a blog post. Good thing I already started this one last week, eh?

Of course, I'd be a lot farther along with this post if I hadn't spent the last half-hour cursing at Blogger because it won't format my posts properly, but there you go. You get what you pay for with this blog, and I get what I pay for with this free blogging software.

Anyway, enough belly-aching about things we cannot change - let's start belly aching about the things we already did change!

When last we left our heroes, they had successfully, and largely without incident - aside from that whole building, dismantling, and storing the storage space part - assembled a brand new resin kit shed! A feat of which we are inordinately proud, considering it took us something like seven months to do what most people can do in an afternoon.

But with the shed complete, it was time to turn our attention to enclosing our plastic storage solution with a nice cedar fence. Why, you may ask, did we want to hide such a regal and well-made structure? Well, we noticed, on our many, many walks around this neighbourhood, that storage and garden sheds seemed to be mostly either in people's backyards, or else tucked carefully away where they were less conspicuous. Not wanting to disrupt the aesthetic of the neighbourhood (any more than we already have), we had planned to extend the existing fence and wrap it around the front of the shed to connect to the wall of the garage.

As much as it pains me to report, and as disappointed as I'm sure all my loyal readers are with the news, it was a pretty straightforward process. I mean, we had already prepared and set the spikes, so it was just a matter of installing the fence posts, and then building the panels in place.

Oh, sure, there were some weird angles, and the spikes weren't EXACTLY in line, but really - it was a fairly simple manner to just build the damn thing. So here are some shots of the work in progress:

I took that last shot up there about 6:30 on a Sunday evening while the Crazy Neighbour™ - who was helping me install the fence boards into the panels - was over at his place digging around in his pile of wood. He was looking for one last piece of cedar 1x6, because our materials estimates were so damn precise that I had accidentally used ONE too many of the full pieces while cutting down boards to make the panels look symmetrical. As always seems to happen (seriously, best neighbour EVER), he had a board tucked away in the ceiling of his shop, and we were able to finish installing the fence pieces that evening.

After that, it was a matter of truing up the gate and installing its hardware, building a little accent piece for over the gate (that also ties the two sides together a little better), and lopping off the tops of the other posts to match the rest of the fence. Which we finished yesterday:

Oh, and here it is from the back:

So far, the most common comment we've heard from neighbours and passers-by is: "Why did you cover up that lovely little shed?"

I haven't actually punched anybody who said that, but there's still time.

Remember the palm tree? Well, this weekend we made use of a perfectly good house guest to finally pull that damn stump out. As you can see, it left a hell of a hole (on the left side here):

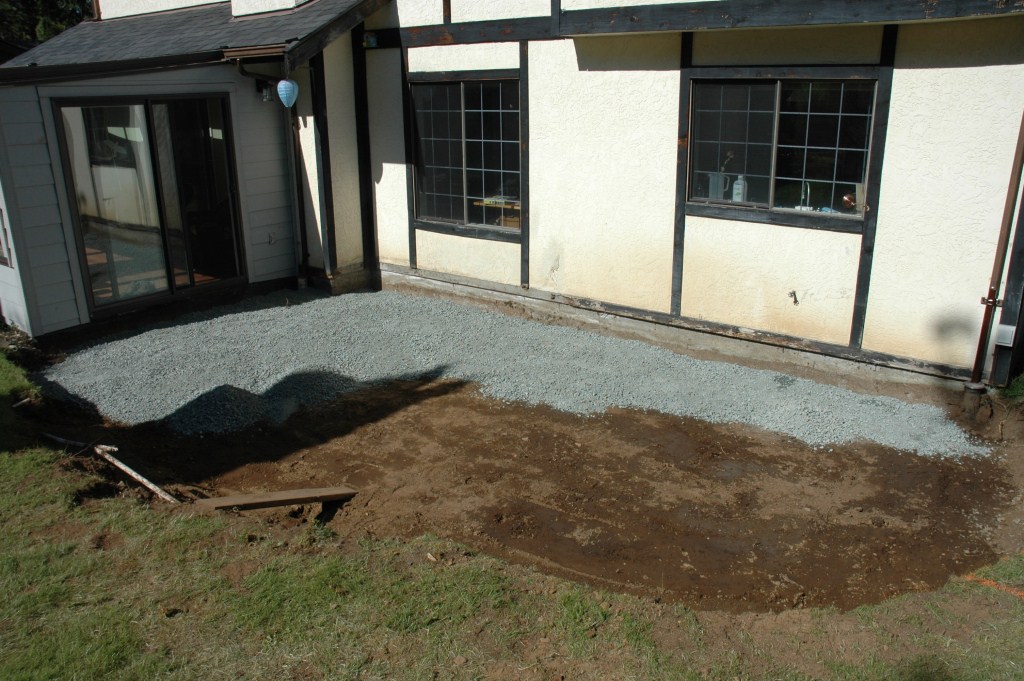
Oh, and see the nice bare earth on the rest of our makeshift patio section there? Yeah, next weekend we're completely abusing our friendship with a lovely couple and making them help us dig it all out in preparation for putting in the REAL patio. Good thing for us they like - and will work for - beer. Man, that's gonna be fun! Yeah!


NOT.

Hey, just for shits and giggles, how about a return of everyone's favorite feature!

The Injury Report

Oh, man, my hands.

So.

Many.

Splinters.

I've got splinters in fingers I didn't know I even HAD.

To say nothing of all the times my fancy impact driver slipped off the screw head and started burrowing into the flesh of my hand, or - in at least one memorable occasion - the webbing between my thumb and forefinger.

But mostly it was the splinters.

Ouch. Stupid rough cut cedar.

Wednesday, April 25, 2012

Yard Work Part One: The Shed

Fair warning: right off the top, I’m not feeling particularly inspired tonight. Probably because I’m so unbelievably tired right now. So don't expect the usual level of awesome you've all come to expect from my blog posts. I mean, I've already re-titled this one eight times, and that's seriously the best I could do right now. I anticipate that this post will be much more pedestrian and plodding than my other work.


(Boy, THAT'S really saying something, eh? Way to really sell it, big guy. Nice going.)


My internal monologue aside, we've been pretty damn busy and, unlike some of our other projects, we've actually got something to show for it!

The bad news is that properly describerating the monumentalishness of our accomplishmentalisms this past weekend will require a bit of flashbackenating to last fall and some explanationering of how we got to the state in which we started our latest undertakingerations. (I made a typo in "describing" and decided to just run with it there. Sorry.)

See, last year, we bought this shed. (I may or may not have related some or all of this story already, but a cursory glance at the archives didn't turn anything up. If any of this does seem familiar, please bear with me while I fill in the gaps for everyone else. Or, at least, attempt to fill in the gaps of my own memory with some fabricated recollections. Two points for whoever can point out which is which.) We really needed a place to store some things for the winter, like our bikes, the barbecues, some stuff from the sunroom, and some other stuff that was taking up a lot of room in the garage. (This will become ironic in a minute.) We decided the best way to suit all of these requirements would be to buy a small, pre-fab shed kit and set it up temporarily on the back "patio" (just for the winter) until we could get around to removing the old shed or finding a more permanent spot in the spring.

So we poked around the usual places and eventually found a nice shed for sale at Home Despot. Of course, neither of our local outfits had one in stock, so we drove all the way up to Dumpin' and the new Home Despot there because we wanted it right away (this will also become ironic in a minute), but the savings on this particular unit were totally worth the trip, and it really was the nicest of the sheds we had seen. So nice, in fact, that it was worth throwing away the idea of a "small" shed, and buying a 7'x7' model that we fully intended to make a permanent part of our yard and garden storage solutions.

So we got the shed home, prepped the site in the back yard and started putting it together. We got all the finicky bits assembled, and started putting up the walls and the roof when we ran into some issues. Even though all the pieces were pre-fabricated, we were having a hard time getting the rear gable piece to lock into the matching holes on the back wall. As it was already getting kinda dark at this point, we called it a day, drank some beer, and decided to try again in the morning.

Well, the next morning came, we looked out our kitchen window at this shed standing RIGHT IN THE WAY, and decided that we, well, hated it. Not the shed - just the location. It was completely blocking the view into and the light from the backyard, and with the sunroom soon to be out of commission for an extended period of time anyway, was kind of making us feel all trapped and cramped. Which is weird, given the size of that back room of ours.

So we talked it over, and decided that the best place for our spiffy new shed would be around the side of the house, beside the garage. The problem with that plan is that the slope of the ground and the presence of, you know, a LAWN, would mean some additional preparation for the site. Which meant we needed more materials.

So it was off to Slegg for some pressure-treated two-by-sixes, a couple sheets of 5/8" tongue-and-groove plywood, joist hangers, concrete blocks, and assorted odds and ends. We brought it all back, unloaded the materials, and ... well, crap.

After a better look at the proposed site, we realized it was a much bigger project than we had thought. See, we had picked a spot that not only had a lawn, but was on something of a gentle slope as well. To complicate things even more, the spot was in full view of the street AND the neighbors' driveway. In order to do this up properly, we would have to level off the slope AND extend our existing fence down the driveway so we could wrap it around and close off the side yard. While eminently doable, it was NOT a project we particularly wanted to start at 2:00 in the afternoon on an autumn Sunday.

Which meant that the shed and its base materials, which we had purchased specifically as a means to increase the amount of available storage space, needed to be stored for the winter - in the garage, which is the exact space we were trying to clear out.

Sigh.

So, the bad news is that I made you read all that as completely needless back story for the rest of the post, where we bring all that junk OUT of the garage, and build us a shed!


Seriously. (No points for anyone who thought I was making part of that up, just to make us look even more indecisive than we actually are. In fact, minus 2 points for obviously not paying attention to our past history. Shame on you.)


The first thing, of course, was to plan out the steps in which we would complete this particular project. Well, actually, we ran out and bought a bunch of material for the fence first, THEN we thought about the steps. Well, ACTUALLY, the War Department thought about the steps while I started hauling random tools and materials out of their hiding spots. Plan? Why? I'll just shut up and get to the pictures, okay?

Let's start with an establishing shot, shall we?

We wanted to put the shed in front of the big pine there, just to the side of the rhododendron - where the pile of brush was sitting.. We also wanted to remove the sections of shed between the pine and the old crappy metal shed, and then build onto the corner of the existing fence to bring it down beside the shed, and wrap across the front to join up with the corner of the house. Oh, and just in case you were wondering why we wanted to remove the old sections of fence...

Not really sure what's keeping that section upright, actually...

Our concerns about the order of tasks was based on not being sure about the amount of room we'd have between the shed and the new sections of the fence. We didn't want to put the shed up first, or we wouldn't have enough room to get the shovels and whatnot in there to dig the holes for the posts or to maneuver the posts themselves. At the same time, we didn't want to put the fence up first, or we'd be pretty cramped trying to assemble the shed. So, the order we (the War Department) decided on was to grade the slope for the shed base, assemble the base, then dig and set the posts, then build the shed, then fill in the fence between the posts. Like all of our plans, it didn't exactly work out that way, but it was surprisingly close (for us), and the end result was still pretty damn good.

First thing on a pretty decent Saturday morning, then, we got out there with some hedge clippers, shovels, and picks and took down the boxwoods along the side of the yard to where we figured the corner of the fence would be. We tore down (in about 30 seconds) the old fence and stacked the all of the brush and old wood in the driveway:

With that out of the way, we paced out roughly the spot where we wanted the shed to go, and stripped off the first layer of sod underneath:

This led to a long, finicky process of trying to make the four corner blocks sit flat - and level across the space between them. To aid us in this endeavour, we built the outline of the floor, and used it as a guide for both spacing and level. Once the War Department was happy with the result (she has to do this part or everything we own would be at a 4-degree angle - I'd call that close enough and move on - bad Don!), we covered the bare dirt with a sheet of heavy poly, set up the corner blocks and outside frame of the base and started prepping to install the floor joists.

Which is right about when my Crazy Neighbour™ wandered over to see what we were doing and ask if he could help.

Now that picture is notable for a couple of reasons... First, it marks the first appearance, on camera, of the Crazy Neighbour™ himself. Second, it marks the exact instance of the last time on this project that I was able to use my brand new impact driver that the Top Brass bought me for Christmas. Once my Crazy Neighbour™ tried it out, I couldn't stop him from using it on everything in sight. I was reduced to tacking on the joist hangers with framing nails (just to hold them temporarily in place) while he came along behind me and screwed them into the joists and end stringers. With MY impact driver.

Sigh.

Well, at least I know what to tell his wife what to get him for Christmas... I might even get to use mine again then.

Anyway, once all the joists were installed, we covered up the poly with a half yard of gravel (keeps the weeds and whatnot from coming up and growing into the floor of the shed, dontcha know), and topped the base with the 5/8" tongue-in-groove plywood (note who gets to use the impact driver again):

We then topped it with the base plate of the actual shed, and turned our attention to the posts.

Rather than try to get a post-hole digger or a power auger into the agglomeration of rocks that passes for soil in these parts, we had bought post spikes - three-foot metal spikes with a collar on top to which you attach the post. Actually, we had bought three different types of these post spikes, but I'm not telling that story because it involves three separate trips to Rona and it SUCKS. Anyway, after reading the instructions on the spikes, and looking at the size of the fence, the placement of the gate, and everything else, we decided to go all Mike Holmes on these bad boys and concrete the shit out of them, rather than just pounding them in and hoping they held up once the winds started howling in the fall.

So that's what we did: dug a nice little hole where the post would go, pounded in the spike until the collar was level with the dirt, and then filled in around them with the better part of a bag of concrete. Each.

After that, it was beer time. Cause concrete is hard work.

The next morning, we went back outside to find everything still pretty much as we left it:

Including the concrete, which had completely failed to cure overnight. Given that the next stage was supposed to be installing the posts, we found ourselves somewhat at a loss. Until we remembered that, hey - we have a shed that needs to be built!

So we hauled all the pieces of the shed out of their cozy little nest in the garage (where they had stood for the better part of eight months or so) and laid them out on the lawn. The first few pieces went together lickety-split, largely because we didn't have to reassemble any of the really finicky bits like the windows and doors - we hadn't taken those components apart after our original, aborted attempt. In fact, it wasn't long before we reached the same slightly warped piece that we had so much trouble with the first time.

Full credit to the War Department on that one - I dunno what she did exactly, but I just held the piece up and she popped in the little bracket thingies just as easy as you please. No problem at all.

In fact, the whole shed went together so quickly that we didn't even have time to stop and take pictures of the process. We do, however, have a few of the end result:


Next time, we fence!