Tuesday, November 15, 2016

Woodworking Project: Balafon Stand

Before I even say anything about this project, THIS is a balafon, okay? As for why I was making a stand for one, well, that may require some further explanation.

It turns out that my coworker Karla is quite the drumming enthusiast, and spends quite a bit of her free time in various drumming workshops around the city. One of her favorite things to play is the balafon, and she owns two of them. So one day at work she mentioned that the adjustable stand she used to support her balafon while playing it was starting to break. Somewhere between her showing me how it was broken and me fixing it, I offered to build her one as part of my work-funded life improvement program. I do not know how or why exactly I agreed to this - she may be a witch. Or a hypnotist. I don't know.

Anyway, it turns out that there aren't exactly a lot of plans online for how to build one of these things. Probably because you can buy a brand new metal one for $40. But I had an idea in my head for how I wanted to make it, and I thought I could do a pretty good job, and that it wouldn't take that long.

I was, as you no doubt already guessed, half right.

I worked on this thing for six solid weeks - to the point that the War Department felt compelled to remind me  that I wasn't exactly getting paid for this (Karla had agreed to pay for the materials) and that it really needed to get out of the damn garage now. Some highlights of the build process:

  • I got to make five separate jigs for this project. Well, four different jigs, but I made one of them twice after changing my mind about the size off the central spacers.
  • I had to stop and rethink almost every single piece of the design at one point or another.
  • I knew that I wanted to make it out of baltic birch plywood, and have copper accents. Actually HAVING copper accents required four separate trips to Home Despot where I stood in the plumbing aisle for twenty minutes, staring at the various connectors and bits and muttering to myself before leaving - empty-handed.
  • It was actually Amy who came up with the one piece of design that had eluded me. Once she figured that out, the rest of it all fell into place. (She suggested epoxying the nuts into the copper end caps, which worked like a charm.)
  • Seriously, every single part of building this was brand new territory for me. It's also the first project I did entirely with metric measurement. (I liked it!)
  • Total cost of materials: about $100.
  • Total cost of labor (at a bargain-basement rate of $25/hour): $2500. At least.
So here are some pictures.

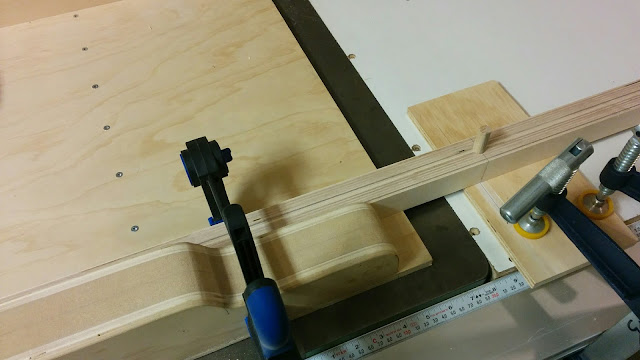
My first design challenge was that the legs needed a hole precisely in the center. After some thought, I figured it would be easiest to drill the hole first, and then use the hole to register the position of the leg on the saw. So I built a jig:


My first attempt at central spacers (and another jig, this one to sand them all down to size/closer to actually round):


I knew I wanted to round over the edges of these, though, and did not want my fingers anywhere near that close to a router bit. So remade the jig, recut the rounds, and made better ones:


Took me three or four tries before I found a technique that worked for sanding up and polishing the copper:


I had an idea to have a special piece serve as both the adjustable lock to hold the stand open at specific heights, and to serve as the handle. I went through several iterations before finding one that worked. These are the first three attempts - I actually sanded and completely prepped the one on the right for finishing, but that was before I found out that I'd messed up the design slightly and had to remake it from scratch:


Two coats of Danish oil, two coats of wipe-on poly, and here's everything ready for assembly:


Clamping up the last piece (couldn't glue that last foot on until everything eas put together):


And it's done!

Folded up for transport (lift up the handle in the center and the whole thing picks right up):


Adjusted to random heights:


And here it is, proving that it works for its intended purpose, with Karla's balafon resting comfortably atop:


Overall, I have to say that it looks almost exactly how I pictured it. I just did not envision the way I'd have to get there...

Thursday, October 6, 2016

Woodworking Project(s): My second commission

So my first commission was pretty much a smash hit. My neighbour liked the doors so much that she wound up putting them in the hallway at the top of her stairs (where guests could properly appreciate them) rather than hide them in her ensuite bathroom as originally intended.


She liked them so much, in fact, that she asked me to make her another set for the closet in her front hall. Same materials, same finish, slightly bigger doors. Of course, I jumped at the chance to actually repeat a project and see if I had learned anything from the first attempt. As it turns out... well, kind of.

I had a feeling this project would turn out pretty good when the guy who sold me the rough-cut cedar turned out to be as bad at math as I am: I got 32 boardfeet of western red cedar for the price of 24. (Cause he had a brain fart and thought 4x8 is 24, not 32. And I didn't realize until I got home because I always make the same msitake. Shut up.)

Anyway, the doors were pretty straightforward (the most exciting part was the new raised panel jig I made and detailed in my last post), and aside from SLIGHTLY miscalculating the amount of lumber I needed (stupid 8-times table), I successfully built two slightly-larger-than-last-time doors:


So one of the things I learned last time is that spar varnish (my chosen finish) is a little thick, and tends to pool in the corners of the raised panels, and along the edges if you're not careful (or just rushing a little, because how many goddamn coats is this going to take, anyway?). I did a little bit of research, and found a couple of solutions that I decided I would try.

First, I finished the raised panels BEFORE assembling the doors in the hope that it would be easier to finish them completely without quite so many corners and whatnot in the way. While the idea was solid, in practice it suffered from a couple of shortcomings: one, the panels were really, really soft, and trying to support them on my little plastic painting risers left dimples in the backs. The only way around this was to finish one side at a time, which prolonged the entire experiment and made me question its value. And two, once the panels were done and fitted into the doors, there was really no way to avoid refinishing them anyway, given all the tight corners and other parts that also needed to be finished.

Second, I found quite a few sources that recommended thinning the varnish with mineral spirits, up to a 50-50 mix, and then applying it like a polish (via a soft rag) as opposed to using a foam brush. You wind up having to put on more coats (like, 6, instead of 3), but you only have to wait about 3 hours between coats instead of 6 or more. I liked the idea of not having to use up a half-dozen foam brushes, and figured I would give it a shot.

Well, it was kind of a mixed bag - though some of that was my fault. I won't go into too much detail, but let's just say that a) you really don't want to mix up a big batch of this stuff ahead of time, and b) I wound up having to put one last finishing coat of pure varnish on at the end to get the depth and sheen I needed.

Anyway, the doors are done, and look fabulous (check out those raised panels - ooh la la!:


Once again, my neighbour is super happy, and that's the main thing.

Bonus project!

I was determined to get these doors all done and installed before the end of September, and finished with more than a week to spare. So I got to spend a very pleasant Sunday afternoon in the garage making a project just for fun.

Some friends of ours had come over for dinner and, like any GOOD friends, had brought along a couple growlers of the finest local craft beer in a handy little carrier. Well, sort of handy. I had a few minor issues with aspects of the design, but really liked the overall idea, and decided to try to build my own - with a couple of enhancements of my own devising.

So I scrabbled about in my pile of plywood scraps and scrounged a length of old rope from a buddy to produce these:


My design improvements included a handle that lets me carry the whole thing in one hand, and a partition to keep the growlers from knocking into each other during transport.  I'm pretty pleased with the outcome, and didn't have to spend any money whatsoever on materials. Well, actually, I did buy a can of spray varnish to finish them off. But even on that I saved money by not using anything GOOD...


Monday, August 29, 2016

Shop Project: Raised panel cutting jig

So, I've been commissioned to make another bi-fold closet door for my neighbour. She wants the same design, materials, and finish as the last one, just sized to fit a much larger doorway. Seeing as that was one of my favorite projects ever (and she agreed to the same price), I jumped at the chance to make another.

But first, I needed to make a raised panel cutting jig. Which, if you'll allow me to descend into full-on woodworking nerd for a minute, I shall explain...

Okay, so my kick-ass table saw has two unrelated, but contributory flaws:

  • First, it has a right-tilting arbor. This means that when I'm making an angle cut, the blade tilts to the right - towards the fence. This is fine, provided I'm working on a piece that's large enough to keep my hand (or push stick) well away from the blade, and the angle required is no more than 45-degrees, which is the maximum the saw will tilt. 
  • Second, I have a router table built into the wing on the left side of my saw, and it has its own fence system. This means that I can't move the table saw fence very far to the left side of the blade. The fence needs a certain amount of rail to clamp onto, and with the fence for the router table in the way, the most I can get on the left side of the blade is about an inch - maybe. (You can see the whole set up - router wing, fence system, blade position - in this picture from an old post.)
When I made the last door, I managed to get the fence set up with just enough room to spare that I could cut the angles on the panels, but it was dicey, and felt decidedly unsafe. Given that a larger door meant I'd be dealing with larger panels, I decided that I had to come up with some way to cut panels the met some rather stringent criteria:
  • It had to be safe. I really don't like getting my fingers any closer to the spinning blade of a table saw than I absolutely have to. I already stuck the tip of my right index finger into a table saw once (many, many, many moons ago), and I have no desire whatsoever to do it again. That meant that there had to be some way to hold the panel steady or guide it through the blade without me needing to brace it with my hands.
  • It had to be adjustable. I was okay if the angle of the saw was set to the exact same angle for every panel, but I wanted to be able to cut thicker panels if I ever had the need.
  • It needed to fit on the left side of the blade. This meant that it had to either use the fence for the router table as a brace, or fit into the miter slot.
After some research and more than a little planning and revising, I finally figured out something that I thought might work. I had to incorporate design elements from maybe a half-dozen different sources, but got the bones of the jig from this article, which - ironically enough - is designed for a left-tiling arbor.

Anyway, it took me the better part of a day to build it, but in the end, I made myself a raised panel cutting jig:


It sits in the left miter slot, and is secured using a couple of miter locks (borrowed from a Kreg featherboard system). The tall fence can be moved away from the blade to a maximum distance of an inch and a quarter, or nudged up to within a few thousandths of an inch. I had originally thought to build a carriage that would guide the panel through the blade, but discarded that plan in favor of using the same featherboard set-up that worked so well the last time. The saw blade must be positioned at 11-degrees, but that gives a nice wide bevel on a 3/4" panel.

Here it is all ready to cut some rasied panels:


With the featherboard holding the panel tight to the extra-tall fence, all I have to do is guide the material straight through the blade. Works like a charm, and feels way, way, way safer than the last time.

I suppose now you want to know what a raised panel is, eh?

Fine. These are panels:


And after being passed safely through the table saw using my raised panel cutting jig, these are raised panels:


And there was much rejoicing and drinking of the beers.

Tuesday, July 12, 2016

Woodworking Project: Standing Desk

A couple weeks ago, my dad came down to Victoria to get some medical tests done (he's fine, thanks for asking) and I decided to take the week off to hang out with him. Well, we needed something to do between driving back and forth to the hospital and waiting for test results, and he's wanted a standing desk for a while so it seemed like the project was kind of picked for us. (I gave him a choice, actually: desk or more frames, and he picked the desk.) He had only a few criteria:

  • There had to be a place to rest his foot while standing at it. Kind of like that handy brass rail when standing at a bar, now that I think about it...
  • The top had to be at an angle to help him when working on photos and whatnot, and had to have a slight edge along the bottom (to keep his pencil from rolling off).
  • He had to be able to disassemble it enough to get it into his SUV for the ride home.

I couldn't really find any free plans online for a standing desk, aside from one or two of the half-desk style that sit on top of a regular desk, and decided that I'd have to design it myself. I played around for a little while with a design for an adjustable height system, but it was pretty clunky and Dad said he didn't care if it was adjustable or not, as long as it was the right height. So I came up with a style and design for the base, and figured we'd handle the top when we got up to it.

A few years ago, when Mister Awesome gave me the oak plywood (that I used to build my bookcases), he also gave me a full sheet of 3/4" baltic birch plywood. I had cut it into big pieces for storage ages ago, but it had been sitting on top of the cabinets in the garage ever since. Given how nice baltic birch can look, even when the edges aren't banded, I figured this would be the perfect project for it.

So I hauled down all the pieces, scratched out some measurements, and came up with a cutlist:


We then very happily spent pretty much the whole week in the garage, working on the desk. We were having so much fun that we didn't take a LOT of pictures, but you're welcome to the ones I have, in rough chronological order..

Taking stock of the material:


Gluing up the leg assemblies and cutting them to size (guest appearance by Lucille, my trusty cross-cut sled):


Pieces and pieces!


It's worth noting here that ALL of the material for this desk, and I do mean all of it, came from my scrap and/or offcuts piles. The plywood, as I mentioned, was a gift from Mister Awesome, the sanded pine plywood I used for the top was leftover from (I think) the bookcases, and the oak banding was all from a load of white oak that mysteriously showed up beside my house. (Seriously, if you gave me a whackload of white oak - mostly flooring pieces and large pieces of trim - I have completely forgotten about it and really need to thank you.) Even the bolts, washers, and nuts were purchased a long time ago for a different project and just never used.

Gluing the banding to the footrest (guest appearance by my new outfeed table that really could use its own post, I think):


Adding splines to the edges of the table top banding (obviously the one day where I didn't have any adult supervision - had to seriously beef up my spline jig to handle this):


I decided to use some plywood as the splines - a little design detail that I'm inordinately proud of, to be honest:


Everything cut, sanded, and arranged for finishing. This is also how it looks when disassembled for transport, by the way. Assembly involves exactly ten bolts; everything else is a half-dado lap joint or just friction fit:


Finishing was just applying a coat of Danish oil to everything:


The Danish oil did a nice job picking up the contrast of the plywood splines in the white oak banding:


Of course, once I finished, I immediately thought of a much more elegant and adjustable solution for the top and even drew it up in SketchUp just to prove to myself that it would work.

So if I ever get given another sheet of 3/4" baltic birch plywood, and Dad wants another standing desk, I can try it again. Until then, though, I think it came out really nice:


Dad's happy (and healthy!), so that's the main thing.

Tuesday, May 31, 2016

Woodworking Project: Photo Frames

The last time I went up to the deepest, dingiest, dankest parts of the interior to see my parental units, I made the mistake of mouthing off to my dad about how easy it would be to make frames for some of his photo prints.

So when I left, I took more than a dozen of his prints with me, and left a promise that I would frame them up for him. It's now almost a year later and I'm about to head up for another visit, and there are still four of the damn things tucked behind the couch in the family room just waiting for me to find some more suitable wood and finish the job.

That does, however, mean that I have actually framed up ten of them and I figured I could at least share the ones that are already done.

The design of the frames is quite simple, mostly because a) the photos are already mounted on foam core, and b) there's no glass required. Also, the frames couldn't be TOO fancy or ornamental, just in case Dad had to put them into a show: you wouldn't want the frame to detract or distract from the photo.

Each side of the frame is a square with a stepped recess cut into one face. The photo is then mounted on the lowest step, with the face flush with the second step. Here's a cross-section of the frame so you can see what I mean:


The hardest part of the whole thing was finding some wood to use. For the first batch of three (done mostly as a proof of concept), I "borrowed" a couple of old fir two-by-fours from my Crazy Neighbour and planed them down to size. Then I used the dado blade in the tablesaw to create the steps, cut four pieces to size, and then glued them up into frames.

Of course, I found out at this point that not all of the photos were exactly the same size. There was a fair amount of variation, which meant that each frame had to be custom cut and sized for a specific photo.


At this point I had a bit of a dilemma. See, end-grain-to-end-grain contact is NOT a very strong joint, no matter how much glue you use. So I had to make the joint stronger - but I didn't want to use angle brackets or additional hardware as that would be cheating. Much to my delight, the answer lay in yet another woodworking jig: a spline jig!

Splines are extra pieces of wood that go across the grain of a joint to allow for more gluing surface and a much stronger long-grain-to-long-grain joint. But to cut across the joint and leave a space for a spline, I had to figure out a way to run just the corner of each frame across the table saw. (I could, I suppose, have cut them by hand, but where's the fun in that?)

After a bit of a false start (i.e., building a completely terrible, useless, not-even-remotely-square jig based on some plans I found on the Internet only to have it SUCK SO BAD that I threw it out), I came up with a design for a spline jig that would attach to my cross-cut sled.


Here's how the corner of the frame sits in it as it goes across the blade:


And this is the cut that it leaves across the miter:


Once the splines were cut, glued in, trimmed off, and finally sanded flush, I could finish the wood. I painted two of the first three black (the wood was pretty bland and crappy, so it wasn't really losing anything), but the one that I finished naturally was by far the nicest.

For the second batch, I used the top of the same old desk that I built the knife rack out of. The wood seemed to be mostly spruce or maybe pine, but it was perfectly seasoned and there was almost no warping of the pieces after I cut them. I managed to get enough for seven frames out of the desk top and the wood was pretty clear overall - some knots and holes, of course, but those just add character. Just as I was really getting going, however, I had to put them aside to get to work on the laundry cabinets and those took FOREVER AND EVER AND EVER.

I finally managed to get back to them once the cabinets were done, and for a few weeks, the entire garage was littered with half-assembled frames.

Instead of painting them, I finished all seven of the latest batch in just natural Danish oil and they turned out pretty spiffy. The splines are a really nice little design detail:


Then I glued the photos into place, covered over the back with some heavy weight plain paper, and they were done. (Dad didn't want any mounting hardware - said he'd take care of it himself and I was only too happy to oblige.)

Of course, the hardest part was yet to come... but I didn't take any pictures of the overly elaborate box I built to ship them in, so you'll just have to imagine it.

As for the photos and frames, I think they turned out all right. Oh, by the way, I should probably mention that these aren't exactly your standard 8x10 desktop photos. They're 36x24 - we're talking wall art here. 


Not to brag or anything, but my old man is a hell of a photographer. I, obviously, am not.

Now I just have to find the time and some decently dry wood to whip off four more and maybe I can stop worrying about building frames for a while. You know, provided I don't leave my folks' place in three weeks with another dozen godddamn photos....

Sunday, February 28, 2016

Woodworking Project: the Knife Rack

After the endless slog that was the laundry room cabinets, I decided I could really use a simpler little quickie of a project before diving headlong into the next major build. As it happened, we just got a couple new knives, thanks to a promotional thing at the local grocery stores and we were running out of places to store them.

We already had a knife block, one of those ones designed to be universal, and it had worked really well for us for a long time. Unfortunately, the little plastic strands that make up the bulk of the block had all become frayed and bent, making it not only difficult to push the knives into the block, but also reducing the number of knives we could store in it. It was also somewhat top-heavy and prove to tipping over - especially given that our new knives were a little on the heavy side.

The War Department though that it might be nice to make one that went in a drawer, and hopefully reclaim some counter space. So after looking around online, I decided on an overall design and headed into the shop.

Of course, this was also the perfect excuse to use my new toy - our Christmas present to ourselves this year:


Ooooh, baby!

A while back, a friend of ours had given us an old desk that she didn't want anymore. I brought it home and cannibalized it for the wood, which turned to be - I THINK - cherry. After picking over the pieces, I settled on a couple of boards that I think were pull-out writing surfaces. Along with a couple of scrap pieces of cherry left over from my tool box project, I planed them down and cut them to rough size.

Then I made a template out of a thin piece of plywood to make sure I got the right shape, and transcribed it to one of my cherry blanks. After cutting and shaping the piece on the bandsaw and belt sander, I had a template I could use for all the rest. Then I simply traced the outline of the template onto each of the blanks and cut out the rough shape of each one on the bandsaw.


The next step was to use the router to trim each one down the exact same shape. I planned to use dowelling to hold the different parts of the block together, so I drilled a couple of holes in the template where I thought they made the most sense, and then made a little assembly line.

I'd start by attaching the template to a blank using double-sided carpet tape:


Then I'd take them over to the drill press and drill out the dowel holes, using the ones in the template as guides:


Then I'd put in a couple of pegs, just to give them a little more stability, and run them through the flush-trim bit on the router table:


Then I'd take out the dowels, prey them apart, and repeat the whole process with the next blank. It actually worked really, really well - except that my router bit was ridiculously dull, and I wound up getting quite a bit of tear-out and burn marks, especially in the corners and at the top of the curves. I thought there was something wrong with my technique at first, but when I went back to put a little round-over on the edges (with a brand new bit), it was smooth as silk. Fortunately, the belt sander was still set up and I managed to get the worst of the burns and other marks out. Then it was just sanding it all smooth with the random orbital and a little elbow grease.

Somewhere in there, I also managed to make the cuts in the fat ends for the smaller knives.

For finishing, I found some really nice salad bowl wax at Lee Valley, and put on a couple coats of that:


And then it was time for assembly, and that's where the project hit a bit of a snag. See, I had planned to use spacers around the dowels to keep the parts at the right distance from each other, but I could not for the life of me find anything that worked. I could have used rubber washers, but Crappy Tire wanted $3 for two of them and I needed something like 30 of the damn things.

I also wasn't completely sold on the dowels being strong enough to hold the rack together. So I found some more strips of cherry, cut them down to size, and then cut dadoes in the bottom of each piece. That way I could glue the pieces in place, with the right spacing, along with a few screws for the hell of it.


As it turned out, I wound up not being able to put the dowels in after all. Something about some screws being in exactly the wrong place and totally in the way and the damn holes being a little too small anyway.

But hey! It works, and I think it looks pretty snazzy:


Lots of room for expansion, too.